Scrappy Trip Around The World, take three

Some of you may remember that I made a Scrappy Trip Around the World quilt a few years ago as a wedding present for friends, and another one for a friend’s baby.

The larger quilt was queen size: here it’s being held up by my father (6’4″) who is standing on a chair:N&AHuge

The smaller quilt was for a baby:
20130731-194654.jpg

Both were made using the Quiltville Scrappy Trip pattern.

I initially thought about doing a pieced back for the large quilt, and I’ve had blocks 12.5″x12.5″ cut for ages with no purpose.  Instead I decided to use them for a new, small, scrappy trip around the world quilt.

The newest quilt will be a lap quilt, in differently-formatted blocks: they’re blocks of 4 instead of blocks of six. The colors are a departure for me, and I’m not sure I’m going to want to keep it in the end, but it’s been really soothing to get back to my machine for a quilting project again.

ST3ST2ST1


WIP Wednesday

Linking up to WIP Wednesday at Freshly Pieced, and to the Small Blog meet-up at Lily’s Quilts. If you’re stopping by for the first time, you might be interested in learning more about me, or in looking at my finished quilts. If you’re interested in any particular kind of project, check out the tags in the lower right sidebar.

This is a remarkably picture-poor post, largely because it’s a to-do-list of the various projects I have in progress right now. Never let it be said that I’m a monogamous crafter? Projects are arranged in (sort of) order of least-work-to-be-finished.

General To-Do List:
-Tape a large piece of batting up on the tops of my two really tall bookcases and pin things to it, in an attempt to create something that sort of resembles a design wall
-Clean crafting stuff off my desk so it’s actually usable for schoolwork.
-Likewise clear books out of crafting space so I can actually sew w/out moving piles of stuff.

Test-Drive Mabel Bag To-Do List:
-Be proud of inside pockets and the fact that the lining actually (mostly) fits inside the exterior of the bag.
GreenBirdInt2
GreenBirdExt
-Attach strap and strap extender once bag hardware arrives in the mail
-Sew around the opening, matching lining to bag outsides
-Turn it inside out to end up rightside out & sew up lining bottom
-Iron (and maybe topstitch?) for a finished, professional look

Mini Dresden To-Do List:
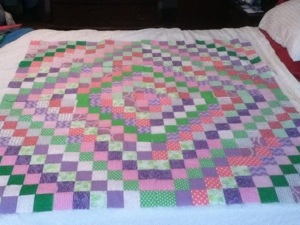
-Back of mini Dresden quilt: alternating tumblers in a variety of fabrics across a brown background: figure out the right size of tumbler
-Finish the corner fans of the mini-Dresden quilt, and arrange so that they will look all right after binding
-Binding of mini Dresden quilt: probably in a darker brown, but possibly in a scrappy series of colors. I’m torn between wanting to make it more cheerful and wanting the focus really to snap to the middle medallions
-Quilt & appliqué!

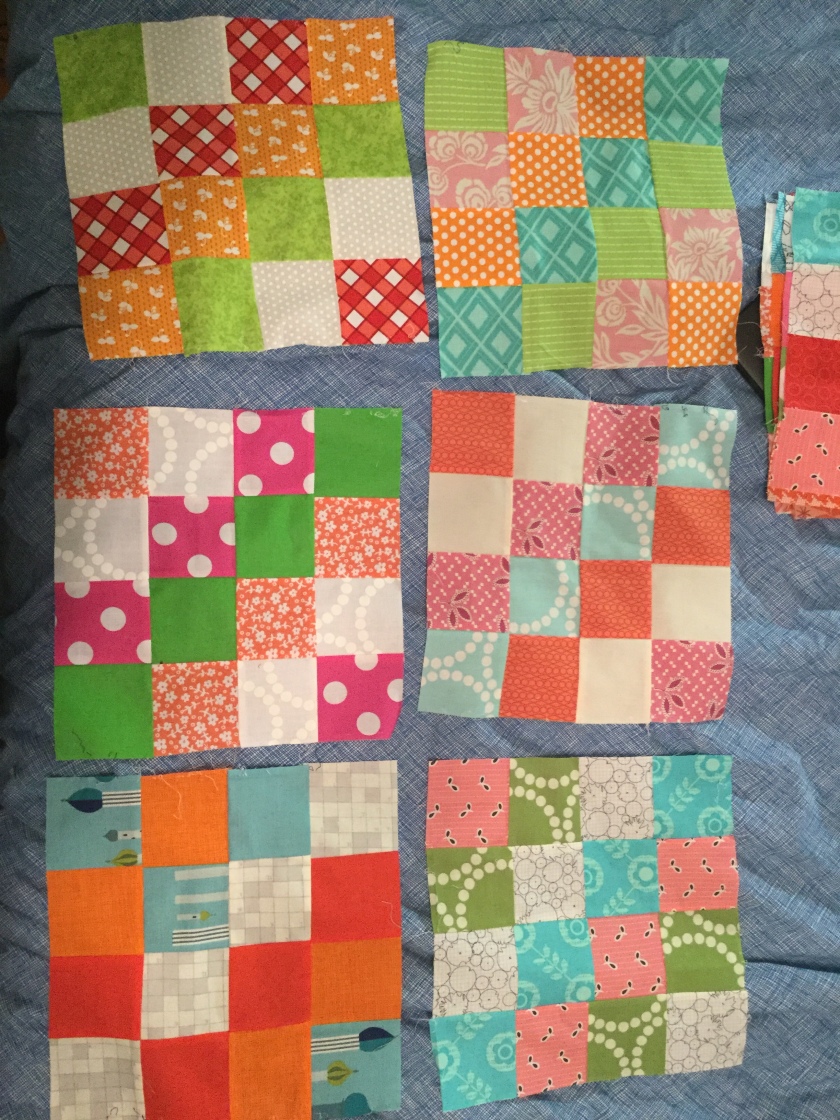
Simple Math To-Do List:
-Finish trimming all blocks from 6-and-almost-a-half-ish-inches to 6″ square
SimpleMathHalfTrimmed
-Re-jigger design to figure out yardage needed to make a double-bed quilt out of slightly smaller blocks
-Pick out sashing & binding fabric (next week, with L, hopefully!)
-Cut sashing
-Piece a scrappy border, alternating white and blue
-Piece entire top (ugh!)
-Figure out backing for the quilt (!?!?!)
-Sandwich, quilt, bind
-Give to mom on October 18

Kitchen Window To-Do List:
KitchenWindowMockUp
-Cut the black 1 1/2″ strips for the “frames”
-Order more Kelly green and cut green strips for “borders”
-Cut about a dozen more organizing cards, number all 36 of them from 1-36
-Start laying out all 36 blocks, figuring out which ones need to be oriented vertically and which horizontally
-Piece blocks
-Arrange blocks on (hopefully!) “design wall”
-Piece top & figure out backing and binding
-Baste, quilt, bind

Knitting To-Do List:
-Subway socks (Malabrigo Monkeys)
-Red NaNo Sweater started in *cough* 2010: finish arms, finish torso. Yes, it’s fiddly cables: suck it up and knit it already.
-Modern Baby Blanket: finish while watching Olympics. Hope I have enough yarn.
-Finish the legs of those red socks already. Give them to mom on October 18.

Spinning To-Do List:
-Get cracking on that yarn for mom’s sweater. Finish it up by December, for a Christmas present.
-Spin exclusively from stash: maybe some merino/yak? Or the lovely greens from MA Sheep&Wool.

Mixtape quilt: zig-zag free motion quilting

I have the house to myself this weekend, which means I was free to set up my sewing machine on the kitchen table for Saturday afternoon and most of Sunday where I’d have plenty of space to move the quilt around and manipulate it, in addition to the benefit of being able to sit at a normal height table. (My usual setup is on a coffee table, which isn’t quite ideal for long stretches of sewing.)

Kitchen setup

I made my way through 1/6th of the quilt before my free-motion quilting foot snapped my needle, and I spent the next few blocks of it keeping a sharp eye on the foot, as it gradually got chipped away by the needle going up and down. I had to cut away part of the clear foot to keep the needle from breaking again, which worked for only a little while longer.

Walking foot2

Then the foot skewed even further, and it became clear that this just wasn’t going to work: the shaft of it was cracked.

Walking foot

I got approximately halfway through the quilt, rolling it up on one side as I went along.

Rolled quilt

But I only got about halfway through the quilt before the foot broke entirely. I won’t be buying this brand again: it was a waste of time and money. (For the record, if anyone else wants to avoid it, it was this one, which I bought on Amazon.com)

Still, I’m pretty happy with the quilting so far: it looks like I basted well enough to avoid puckering. The recipient asked for zig-zag lines, which I think are working out all right. Seeing as it’s the first time I’ve ever free-motion quilted anything, I’m not unhappy with it — just with the photography today.

Quilting detail

Better photograph of the Scrap Attack quilt

I finally pressed it, (not that you can entirely tell: the light green fabric is a little cranky) and it’s all ready to quilt and bind. Then, of course, I have to decide who to give it to. It’ll probably sit on a shelf for a little while until a baby or a birthday comes along.

(More information about the fabric and so on is here.)

Scrap Attack quilt top finished!

Well, it looks like my worries about not finishing in time for Monday’s deadline were unfounded. I finished the top of my scrap quilt just now.

The fabric is almost entirely scraps from the Nine-Patch quilt. I had three central squares worth of strips, and pieced the fourth central square out of the edges and scraps from making the other squares. The greys all came from a scrap pack from FabricWorm, which I’m glad I impulse ordered a few weeks ago: without it I would have had a much harder time making anything even remotely quilt-sized. The only things I pulled from my fabric stash are the charcoal sashing and the green pezzy prints for one border.

It’s about 45×45″ though I imagine it’ll lose a tiny bit of size when it’s quilted.

I’m planning to bind it in the same charcoal that I used for sashing. I honestly have no idea what I’m going to use for a backing, but I suppose I have time to figure that out.

On Monday, I’ll go back to the Simple Math quilt, and what happens when the person you’re making the quilt for says “Oh, by the way, can you make it a full instead of a twin?”

Nine-Patch Lattice Quilt


This is the Nine-Patch Lattice Quilt from Oh, Fransson!, Elizabeth Hartman’s quilting blog. I stumbled across her tutorial on how to make crazy nine-patch blocks a year or so ago and thought it was genius. So when I got the urge to try my hand at quilting something that actually had a pattern, I thought of the tutorial, visited her blog, and found the Nine-Patch quilt. The practice blocks I did were mock-ups for this project.

I didn’t end up going for crazy blocks, because I preferred the lattice effect of symmetrical squares. I strip-pieced the blocks, which made everything much faster and easier, and aside from learning that I can’t sew a scant 1/4″ seam without a guide of some kind (and even then, I sometimes manage to sew a slightly wider seam, just enough to throw things of a teeny bit overall), it went very smoothly.

I used nine fat quarters I’d picked up at a Joann Fabrics to use together. Originally I was going to use the green sheet I used in the test pillow squares as sashing, but something about it didn’t quite look right to me. So when I went down to Brooklyn General to pick up a 6×24″ quilting ruler, I brought along one of the squares, and laid it against some of the fabrics they had there. This is Kona Cotton in Navy (if I recall the color correctly: a dark blue, in any case) and I really like the way it sets off the greens.

One of my favorite things about this pattern is the back:

The little squares remind me of stained glass windows, glowing in the darker wall of blue fabric.